Concept Reviews & Cubed Steak Sandwiches

Working in the Project Management IT world I complete a lot of concept reviews when working on MANY projects. 🙃 However, what I didn’t realize is that is sort of how recipe building works too! That is what brought me to this delicious steak sandwich.

I love watching the food channel and cooking shows and one of the Chefs I love is The Pioneer Woman, Ree Drummond. First off can we talk about her products at Walmart??? I own a significant amount of kitchen appliances… I now need to throw one appliance or tool out when I buy a new one so a lot of thought goes into my purchases. 🤪 Back to Ree – I own three cook books that I have read at least 3 times. I own every utensil she could possibly offer to use in the kitchen down to her pie cutter people. I own her toaster, crockpot, Pots & Pans, I digress. It is an unhealthy obsession, but it is:

  1. Available (Pretty much everywhere there is a Walmart)
  2. Pretty
  3. Affordable
My Pioneer Woman Cookbooks – I have a thing for Sticky notes and colors, but it helps me organize my recipes.

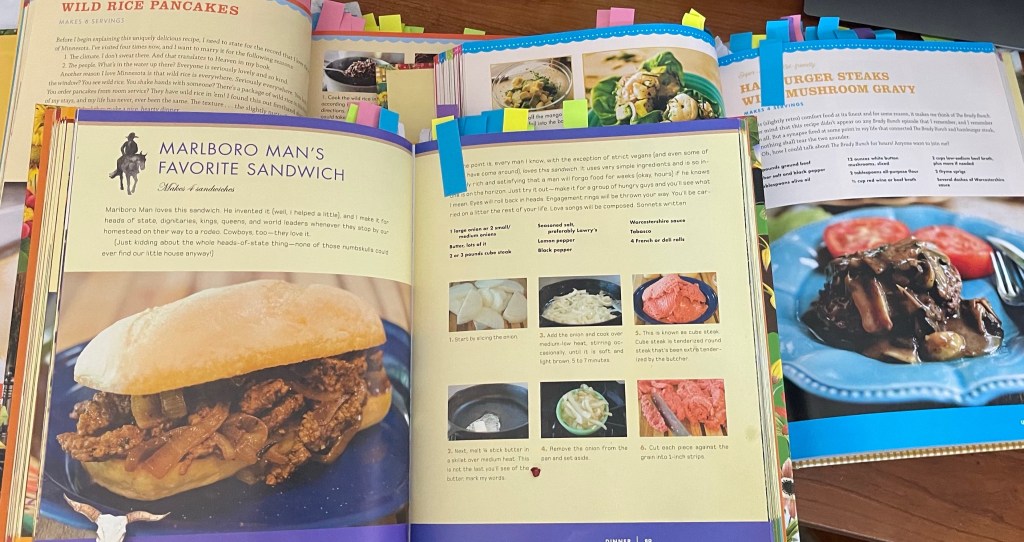
SO – lets talk about how I “reviewed” a “concept” and then changed it entirely. The story behind her Marlboro Man Sandwich is what really made me want to try this recipe. (I highly recommend looking it up or reading it if you have her book “The Pioneer Woman Cooks” Recipes from an accidental Country Girl.) She uses Cubed steak in this recipe. Once I got to reading the recipe and looking at her spices I decided it probably wasn’t something for me. I will say she has some unique flavor ideas throughout her books.

HOWEVER – here comes that whole concept review thing I was talking about. Why not use the cubed steak but season it the way I usually would if I was using shaved steak to make steak and cheese????🤔 Also I do not have a huge pan to toast massive rolls either like the recipe calls for so lets do what I did a few weeks ago and use the broiler and incorporate the leftover heat. Guess what? IT WORKED! It was delicious and I think I may be giving up on shaved steak for steak and cheeses for a bit! 🤫😬

So before I share the recipe below remember do not be afraid or shy away from a recipe just because there is a spice in there you may not like, you do not have the correct pan, or there are too many steps – because you could be missing out on something delicious. Take recipes and make them your own – but never forget to give credit where credit is due!!!

This is George he likes squid 🦑 *Fun fact 3897492:
I own a saltwater fish tank!🐡
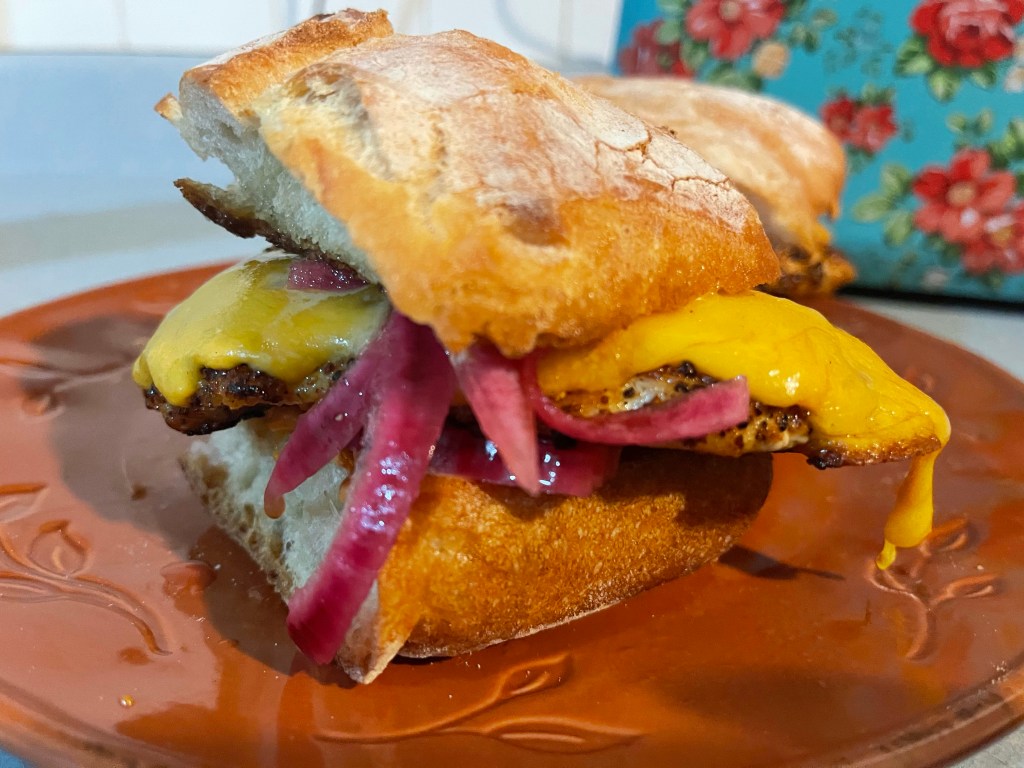
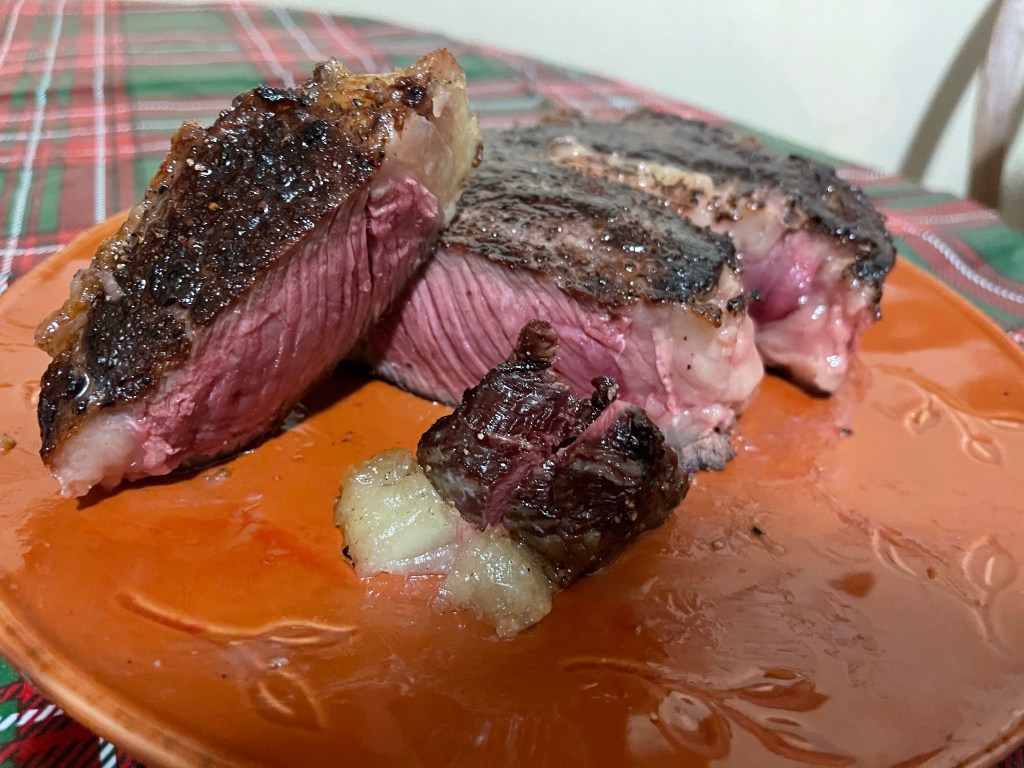
CR Steak Sandwich

For my meal I only got enough for two sandwiches. Add more to the recipe based on who your feeding. For the Shredded cheese you can use whatever you would like, I used Trader Joe’s Sharp White Cheddar and I wish I had more. You can use sliced cheese you may need to leave them in the oven longer to melt though.
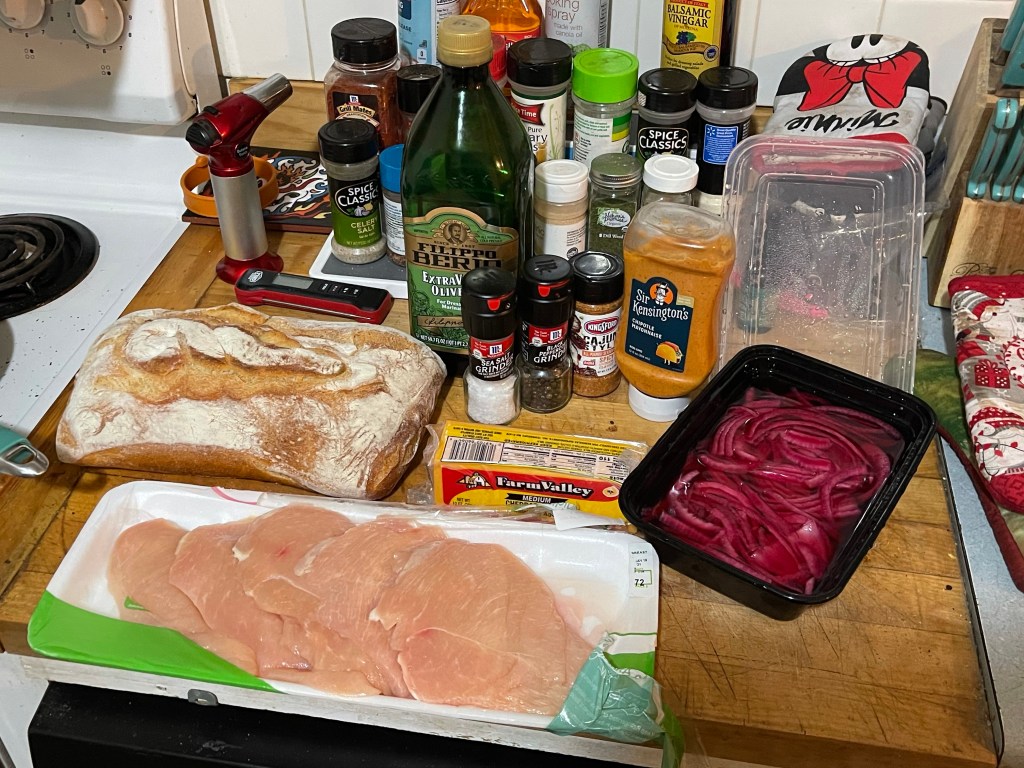
Ingredients

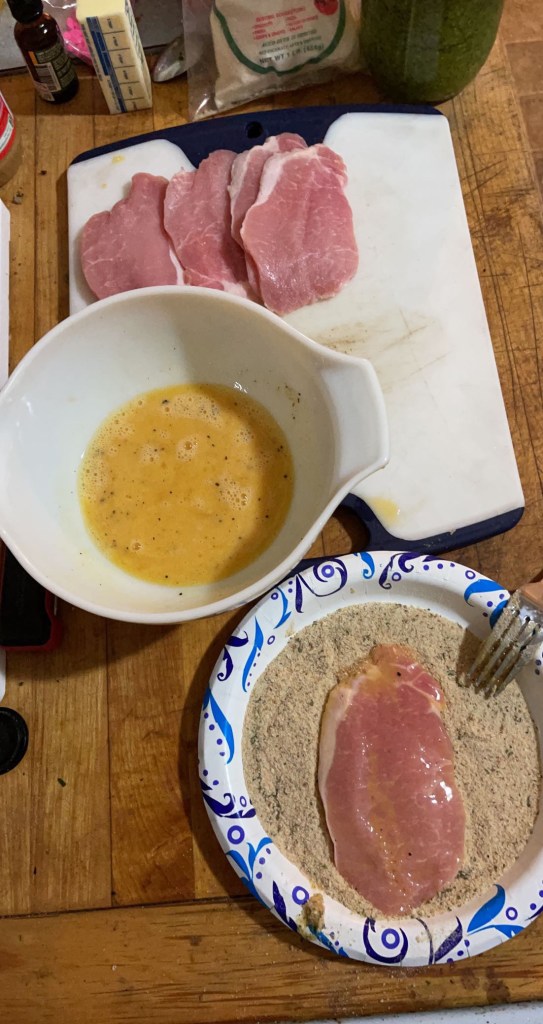
  • 2 Packages of Cubed Steak
  • 2 Sandwich Rolls sliced in half
  • 1 cup Shredded Cheese
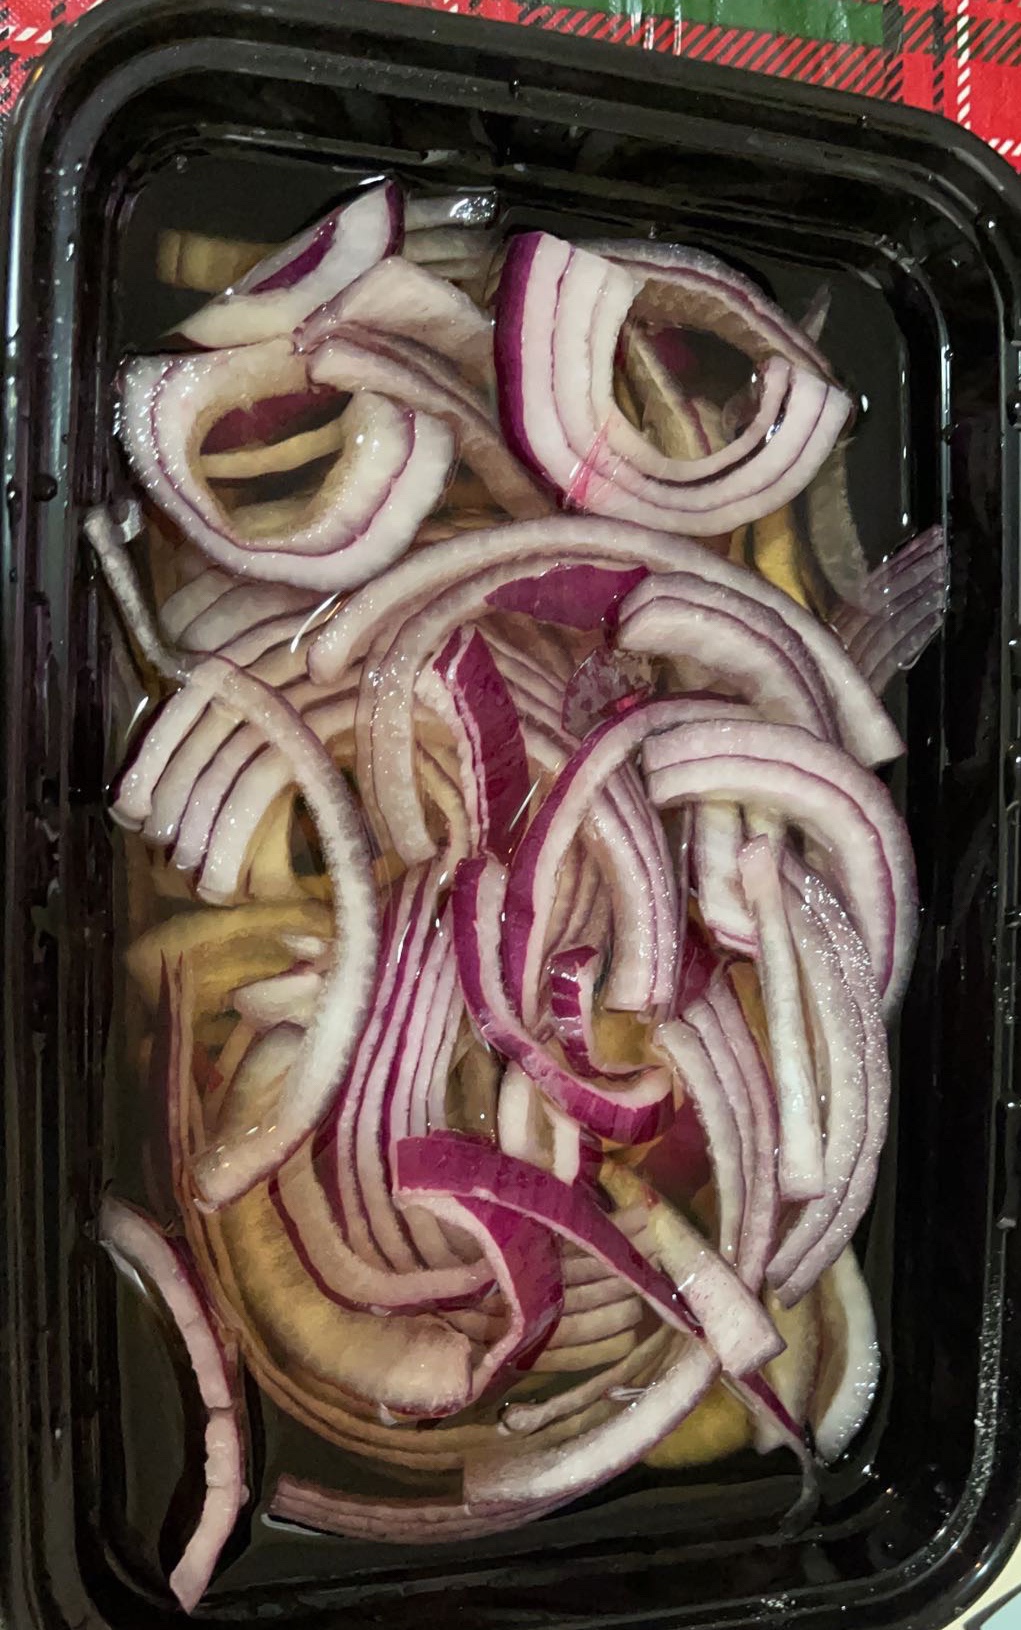
  • 2 Medium Size Onions sliced
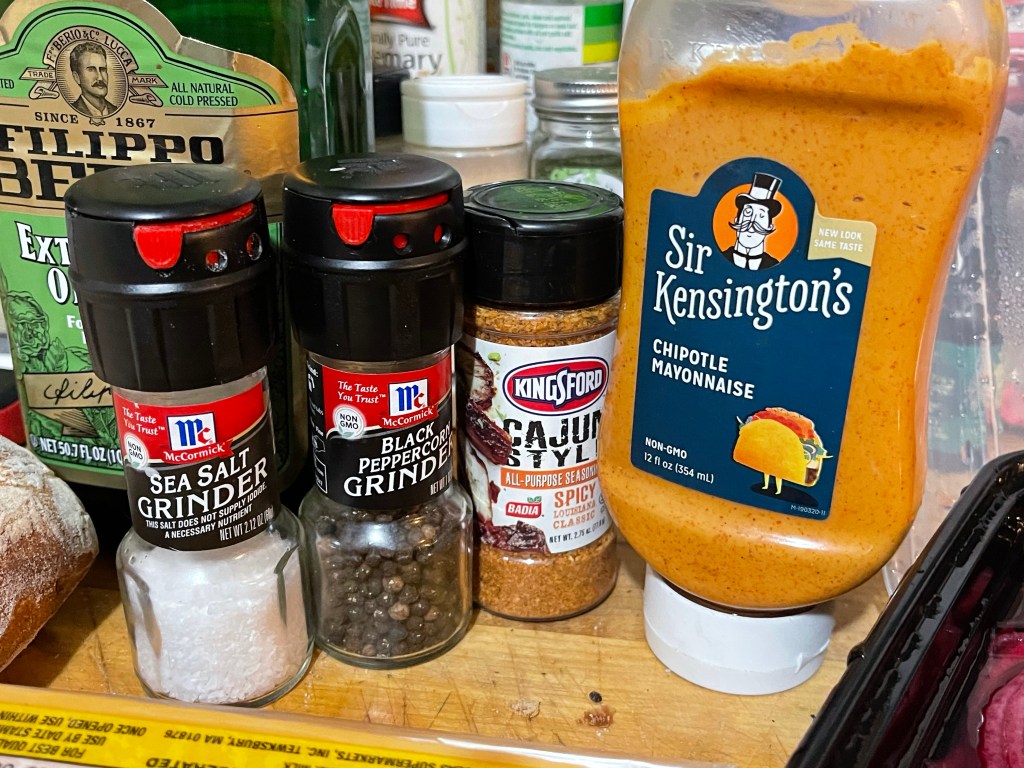
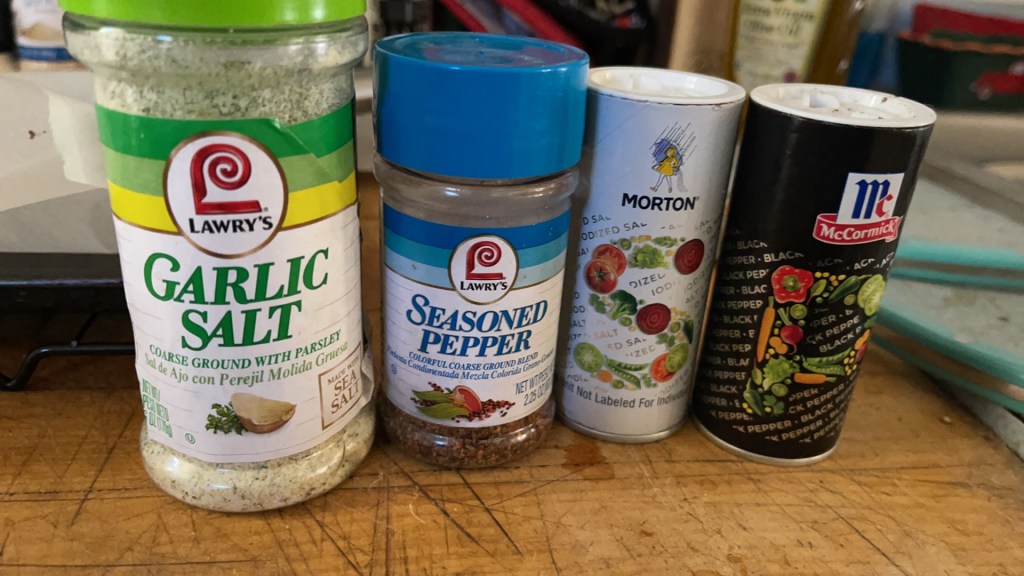
  • 3 Tsp. separated Garlic Salt
  • 3 Tsp. Seasoned Pepper
  • Salt & Pepper to taste/shake
  • 1 stick of butter cut in 1/4’s

Instructions for the Steak &Onions

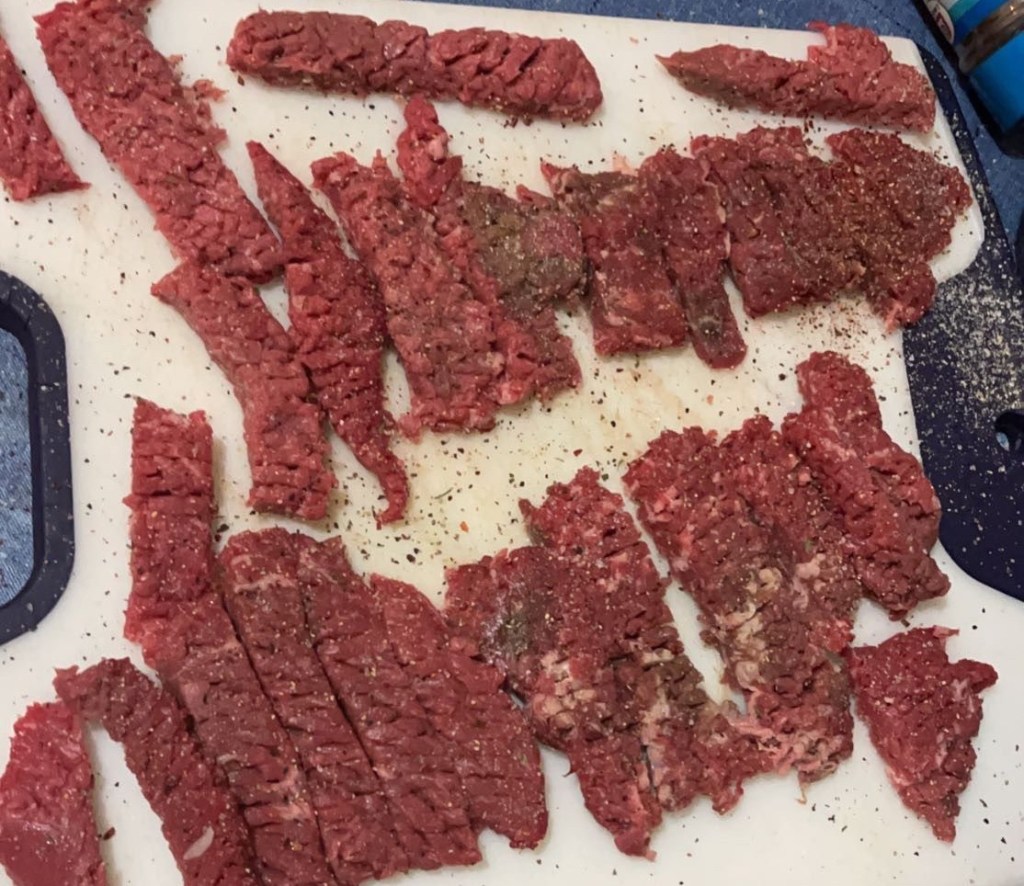
  1. Take the cubed steak and cut it in strips against the grain (Thanks Ree!!)
  2. Take 1 Tsp of Garlic salt and 1 Tsp of Seasoned pepper and sprinkle it all over one side of the strips. Take the salt and pepper shakers and do the same but just lightly and once. (We have a decent salt and pepper on there already so you can skip the salt & pepper if you want to)
  3. Place your cast iron skillet (or pan) on Medium high heat. Place 1/4 stick of the butter into the pan to melt.
  4. Once the 1/4 stick of the butter is melted add the sliced onions to the pan.
  5. Take your 1 next Tsp. of Garlic Salt and 1 Tsp. of Seasoned Pepper and spread all over the onions in the pan. Then take your salt and pepper shaker and shake it all over the onions.
  6. Sautéed the onions until they start to turn golden/yellowish.
  7. At this point I push them to one side and move that side of the pan off the burner just a smidge. (I like to not remove things from the pan because you dirty more dishes but you can do that at this point)
  8. Add another 1/4 stick of butter (it will be hot and sizzle and it will melt quick)
  9. Add the strips to the cast iron pan on the melted butter seasoned side down.
  10. Now take your other 1 Tsp of Garlic Salt and 1 Tbsp of seasoned pepper and season the other sides of the cubed steak strips. Take the salt and pepper and shake it over the strips lightly. (Or again you can skip the S&P) (Also you could of already season both sides and in that case skip this step. 🙂 – I just make enough of a mess its nice to make the mess in the pan)
  11. Let the strips cook for 1-2 minutes depending on thickness and then flip all the strips.
  12. Cook on the other side for 1-2 minutes and remove.
  13. Your Filling is complete!!
Here’s the Spices
Cubed steak cut and one side seasoned

Instructions for the Rolls

  1. Turn your Broiler on High
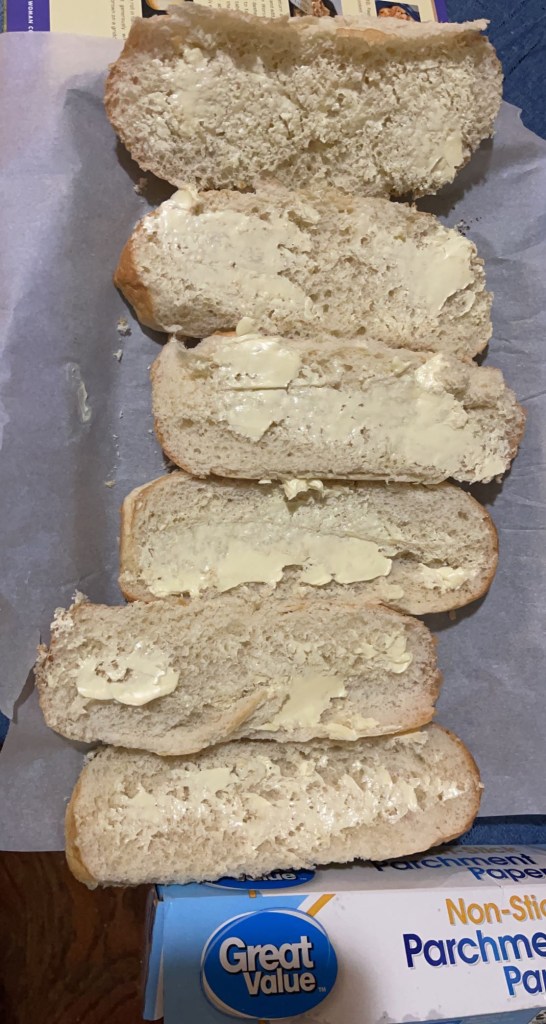
  2. Take the sliced bread and using the 1/2 stick of butter left butter the open side of both the Top & Bottom roll (see picture below)
  3. Place the pan into the oven and Broil for 1-2 minutes (watch your bread it can burn fast – hence why there is three just in case)
  4. Remove the bread from the oven and shut off the broiler QUICK – close the door trap the heat in there.
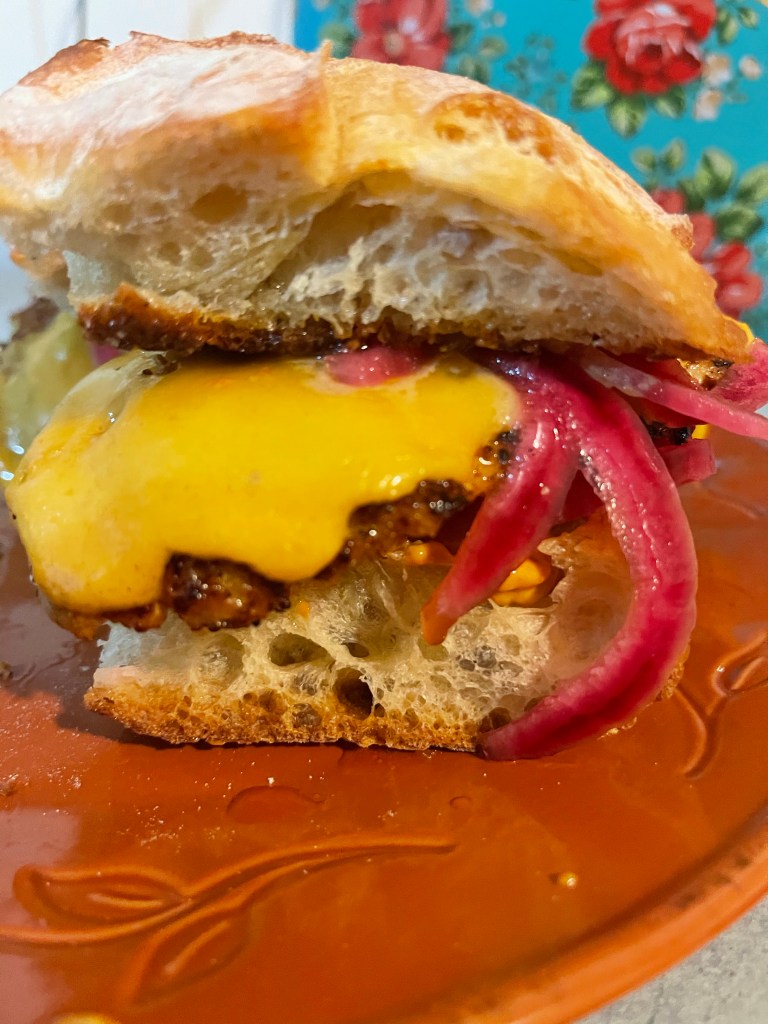
  5. Now take your shredded cheese and generously apply it to your bottom rolls
  6. Throw it back into the oven to melt (When you use block cheese and shred it yourself it melts faster, its cheaper, and its delicious. If not you may need to put your oven on 250° to help melt the cheese if you are using pre shredded or sliced type of cheese)
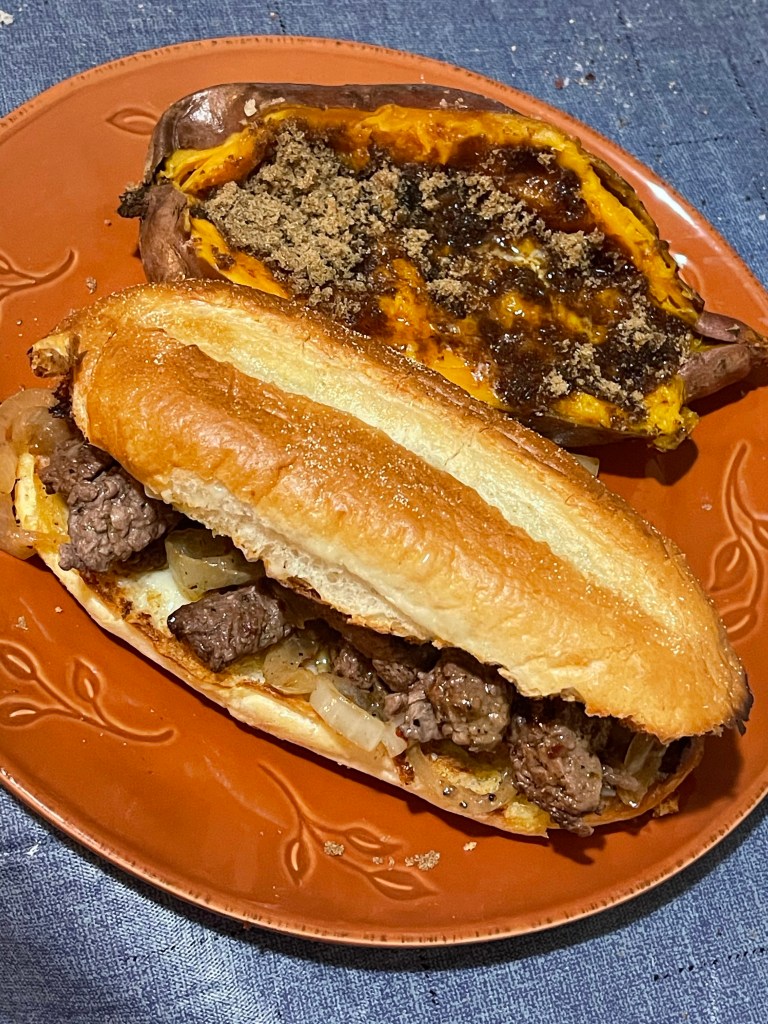
  7. Remove the bread and build your Steak Sandwich!

Enjoy!!

Butter the open side of the sliced roll
Cheese melted ready for your Steak filling
Final Product

Cajun Chicken Sandwich 🤤

Now that I have shared the Pickled Onion Recipe and my Mesquite Chicken Sandwich story. Let’s talk about how I built off that.

So as I have said before I do not mind driving or traveling far for some good food! I can tell you I would rather eat BBQ and Sushi in Texas then anywhere close to me in New England. Ghirardelli has the best chocolate shakes and hot chocolate in the universe (Disney Springs), Santarpios in Boston for the best pizza and lamb tips. I could keep going, but I digress. Well I cannot run to Texas every time I want BBQ and I cant go to Disney every time I want a Chocolate Shake (Although that would be fantastic if I could) so what is one to do?

Learn!!! Taste the food and then figure out how to bring that recipe home, but more importantly how to make it BETTER!!!!!! This is one of those recipes and its delicious. Each time!💃🏼

Ingredients

  • 4 Tablespoon Oil Separated 1 – 3
  • Cuban Bread (this can be in a loaf or buns totally up to you) Sliced for Sandwiches
  • 4 – 6 Chicken cutlets
  • Salt & Pepper
  • Cajun Spice (I used KingsFord Cajun Style all purpose seasoning)
  • 1/2 – 1 Block – Cheddar Cheese cut into slices or you can shred
  • 2 Tablespoons – Pickled Onions (More if desired)
  • Chipotle Mayo (Sir Kensington’s has a good bite to it, but there re many different types)
All the ingredients you will need
Close up of the Spice and Mayo

Instructions

  1. Take the chicken cutlets wash and pat dry.
  2. Salt and Pepper both sides of each cutlet then lightly coat both sides with the Cajun spice (a little goes a long way).
  3. Add the 1 tablespoon of oil to a frying pan spread it around and place on a burner on medium heat
  4. Use the Other 3 tablespoons of oil to brush the soft part of the bread for the sandwiches
  5. Using another frying pan dump excess oil from brushing the bread into the pan and place on low-medium heat. Place the buns soft side down to toast.
  6. By now the other frying pan with the tablespoon of oil should be warm. Place cutlets in the pan do not overcrowd but if you can fit 3-4 throw them in there.
  7. CHECK YOUR BREAD – if its golden brown or crisped to your liking take it off if not cook it longer but keep an eye on it.
  8. You want to cook the cutlets for about 3 minutes then flip them. (If you Have a thicker cutlet this will take longer.)
  9. Once you flip it over you can then place the slices of cheese on top in order to allow it to melt while the chicken finishes cooking.(if its shredded you can put it on last minute with tinfoil over it and it will melt quickly)
  10. The internal temperature for chicken should be 165° and it is ready to serve. If your cheese isnt melted you can turn the burner off and cover the frying pan with tinfoil and it will melt quickly.
  11. Remove the cutlets (repeat steps for remainder of the cutlets)
  12. Take your bottom toasted bread and layer as follows
    1. Cajun mayo enough to coat the bottom (I like extra)
    2. Then add your pickled onions (Again, I like extra)
    3. Now your chicken
    4. I usually add more pickled onions (you can add whatever else you might like lettuce etc.)
    5. Top Bun
  13. Enjoy! 😉
😍🐺Nothing related to food – Aren’t they Adorable 🐺🥰

Portland & Pickled Onions 🧅

I am known to travel for food. Anything food related intrigues me! One of my favorite little food destinations is Portland Maine. There is something about the Old port – nothing beats walking around and spending your day enjoying this beautiful ocean side city that Maine has to offer along with so many other places. Believe me I lived in the Bangor Maine area for a bit and I loved food and going out to eat, and exploring even then. Old Port offers so many different things from breweries, bakery’s, restaurants, bars galore, and cool little shops to explore. There really is something for everyone in that town to enjoy! I highly suggest visiting Old Port and walking around if you are in Maine there’s nothing quite like it. 🛥

One of the places I loved to go when I was spending the day in Old Port was Mash Tun. They had this Mesquite Chicken Sandwich that was to die for. Pretty much anything on their menu is great!! I will warn you its a small menu Burgers, chicken sandwich, and a few other things – BUT – everything is perfect every time!! 🤤

Back to this Mesquite Chicken Sandwich! I remember the first time it was served to me because there were these fluorescent pink onions on it. I thought I wasn’t going to want anything to do with and would be pushing them to the side. (I mean they were pink and I HATE the color pink…😝) However, after that first bite I learned not all thing Pink are terrible because these little things were delicious. 🤤

The restaurant is set up so you can sit at the bar and watch the chef cook, so one day I asked if these amazing little Pink things were hard to make and the Chef said they were not. We talked a bit more and I headed home on a mission to learn how to make Pickled onions on my own!

The cool thing about this recipe is there are so many versions of it and you can add jalapeños for spice etc. BE BRAVE do something crazy! It’s easy enough that if you do not like it you can do it again with a red onion and relatively cheap ingredients. I do not even measure anymore so it comes out a little different each time but always delicious. 😅😋

For this recipe I realized I was out of mason jars – so – I improvised. 🙂 TUPPERWARE – my best friend I can clean it or toss it 😜 Regardless of what you use you want to make sure it has a lid that will stay sealed overnight (12-24 hours).

Pickled Onions

Ingredients

  • 1 Large Red Onion
  • 1/2 Cup Apple Cider Vinegar
  • 1/4 Cup Warm Water
  • 1/2 cup White Vinegar
  • 1 Tablespoon Sugar
  • 1/2 Teaspoon Salt

Instructions

  1. Cut the Large Red Onion in half. Then take the half’s and slice the onions on the thinner side.
  2. Take your Mason Jar or Tupperware and add the sliced onions to the container.
  3. Add the Apple Cider Vinegar, Warm Water, White Vinegar, Sugar, and Salt to the container with the Onions.
  4. Place the top on the container and shake – shake – shake – shake senora – work – work – work senor – ok seriously though shake it up
  5. Now put your container into the fridge and let it marinate and do its thing for 12-24 hours (you want your onions to be soft and look bright pink in color)
Cajun Chicken Recipe to Come – But check out those colors!!! That is what your looking for when you open your onions.

Quick yet delicious!

If my Great Grandmother were still here I’d like to think she would be proud of where I have come with my cooking. She was the OG chef in our family! Married to my Great Grandfather during WWII, moved to America from Italy and she brought all her delicious recipes with her. If you asked anyone who has ever tasted her cooking I guarantee you they would say they miss it and it was always amazing! Luckily for me she passed her skills down to my Grandmother who has passed some secrets down to me! 😎

Pesto Queen and my boy Brady 💙

One of my favorite dishes she used to make was Pesto which was usually paired with some little steaks or chicken type dish. My Grandmother taught me how to make it and I cook this dish at least 2 times if not more a month. I used to cook it so much I was requested to cut back on the amount of times I cook it 😂😅 And even now if my Grandmother was to ask me what I want for dinner my answer would first and always be pesto! 🤤

Then usually it is followed with a request for something that I like to call “little steak, chicken, or pork cutlets”. Pesto pretty much on anything makes it delicious in my opinion… However, for this recipe that is the ingredient I cannot share. Remember when I said there were some family recipes that I couldn’t share? Well this is one of them. However, you can buy pesto pretty much anywhere now premade. (It’s much easier than making it!) The second piece of this recipe however is super easy!

So before we dive in let’s talk Bread Crumbs! I don’t know about you but one of the things I can never seem to have enough of in my cabinet is bread crumbs. Something that I buy when I know I only have 1 container left, because I use them so often I do not want to run out. You will see throughout my blog posts that Progresso Italian Style Bread Crumbs are my go to and used often.💃🏼

What you will need for the Little Cutlets:

  • Pork Cutlets (I usually buy two packages *you can use steak or chicken as mentioned above)
  • Progreso Italian Style Bread crumbs
  • 4 eggs (all depends on how many cutlets but you can always make more egg wash if needed)
  • Salt
  • Pepper
  • Oil

In a frying pan add enough oil to go about a half inch up from the bottom of the frying pan. Place on medium – high heat. Oil needs to be 350° in order to fry. I would stick closer to medium heat because you do not want to burn them. *The thermometer I recommended in my last blog can be used to check the oil temp as well just by dipping the tip in the oil

Pork Cutlets, Egg Wash, bread crumb plate

Crack 4 eggs into a bowl add salt and pepper and whisk away. Put aside. Clean your pork and I usually use a paper plate to dump my bread crumbs on.

Your gonna coat both sides of the pork cutlet in the egg wash and then coat both sides of the cutlet with bread crumbs then transfer to the hot oil to fry.

PRO TIP:

1. Although best to avoid eggshells at all cost we are all human! So if that tiny annoying shell drops in don’t worry just use the larger intact half of the eggshell to scoop it out. It sort of works like a magnet and is way easier than any other way of trying to get it out trust me I’ve been fingers deep in eggs it’s gross. 💁🏼‍♀️😅

2. I create an assembly line for this recipe as it makes it way easier to cook. I have my Pork cutlets followed by my egg wash then my bread crumbs. Right next to the hot oil pan. So I go from egg wash to bread crumb right to the hot oil to fry. Less mess when I do it this way ass opposed to prepping the cutlets first. Which you can do if you want.

Fry Away!

Your going to fry the cutlets until they are golden brown or if you like it crispier like me I sometimes overcook or turn the oil up at the end to do a few cutlets this way. I’d say let the cutlet fry for 2 minutes check the bottom see if it’s starting to brown if it’s golden brown flip it over if not let it continue. Then repeat.

When golden brown I use a fork to pick up the cutlet and let the grease drain out till its only dripping. Then I transfer the cutlet over to a wire rack and let the remaining grease drip off. Once finished with all the cutlets I make my side dish and then serve.

In my house usually 3-4 disappear as I cook 🤷🏼‍♀️🤷🏼‍♀️

One golden brown Little Pork Cutlet and one Crispier cutlet as described above👩🏼‍🍳

Recipe:

  • 8 Pork Cutlets
  • 2 cups Progreso Italian Style Bread crumbs *if you need more add
  • 4 eggs
  • Dash Salt
  • Dash Pepper
  • 2.5 cups of Oil
  1. Clean pork cutlets and pat dry bang out if you want thinner cutlets at this time
  2. Pour 2.5 cups of oil into frying pan on medium heat
  3. Crack the 4 eggs into a bowl and shake some salt and pepper
  4. Whisk the eggs salt and pepper together
  5. Pour 2 cups of progresso breadcrumbs onto a plate
  6. Take a pork cutlet and place into egg wash bowl coat both sides of the cutlet with the egg wash
  7. Place the pork cutlet into the bread crumbs and coat both sides of the cutlet with the bread crumbs
  8. Place cutlet into hot oil
  9. Cook cutlet until bottom side in the oil is golden brown
  10. Once the bottom is golden brown flip the cutlet and cook till the entire cutlet is golden briwn
  11. Drain and transfer to wire rack to allow remaining grease to drop off
  12. Serve with your choice of side when all cutlets are finished frying

Coconut shrimp Alfredo under $20 for 2

YES, Shrimp 🍤 for under $20 and it probably would of been less if I decided to pick a different Alfredo sauce. Ever heard of this show called Guys Grocery Games? Well I am obsessed with it, pretty much with anything involving Guy Fieri and television is my go too. Also, love the Bon Appétit free television channel available through your Smart TV on TV plus. I have learned so much through cooking shows and I enjoy watching them so if you like cooking start watching you pick up on so many tricks and techniques.

So back to Guy and his Groccery Games. On GGG as most of you will probably know they run around the supermarket grabbing ingredients sometimes with limitations and have to cook a dish all within a certain timeframe. So I got to thinking one night why can’t I pull off something quick and easy like they do in under 20 minutes?

Well turns out I could!

Coconut Shrimp Alfredo

What you will need:

Under $20
Pre-made Coconut shrimp (I got mine from Mckinnions) $7.50
Jarred Alfredo sauce $6
Penne $1.50 (half a box)
Fresh garlic and chives minced $2 at most

Boil and start cooking your pasta (add salt to your water 😉) in one pan. Now get another sauce pan out for the Alfredo.
I diced the garlic and some chives. Then I put some olive oil in the sauce pan. I got the sauce pan and the oil hot and threw the dice garlic and chives and sautéed till garlic browned. Dumped the Alfredo into that same sauce pan and added salt, pepper, garlic salt, and seasoned pepper. Turned the heat to low so that it would slowly heat up and take on the flavor of the sautéed stuff. Stirring it constantly and letting it heat up you want to make sure the heat is low enough and your stirring enough so that you do not burn it and then leave yourself a heck of a mess to clean up 😕

When the pasta is done strain and add to Alfredo. Stir and serve however you please – today like I chose a bowl! Then I chopped up some leftover fresh chives for a picture and honestly I just like chives 😝 🙂

Next heat up enough oil on a frying pan to coat the bottom so it looks like a small puddle but you don’t need to go up super high in the pan it’s ok if you do just a waste of oil in my opinion. I then fried the precooked shrimp to golden brown the coconut crust and give it a nice crunch. Transfer them after turning and browning both sides to a cooling rack. (Oil typically needs to reach 350° to fry something so let it heat up for a little)

Ingredients

  • Pre-Made Coconut Shrimp
  • 1 Jar Alfredo Sauce
  • Half Box of Penne Pasta
  • 2 Cloves Fresh Garlic minced
  • 1 tablespoon of Fresh chives minced
  • 1/2 Teaspoon of Salt
  • 1/2-3/4 Oil set aside (this will depend on pan size)
  • Salt and Pepper to Taste
  1. Add 4 cups of water to a sauce pan and place it on medium high heat to boil the water for the pasta.
  2. Once the water comes to a boil add your pasta you will cook for about 10 minutes.
  3. Add approximately a teaspoon of oil to a sauce pan and place on medium-high heat
  4. Mince/Dice both the Garlic and the Chives and toss those into the sauce pan with the oil turning it closer to medium heat sauté until garlic pieces start to turn golden
  5. At this time get your frying pan out for the Shrimp and place on medium high heat. Add the 1/2 cup of oil to the pan and let it heat up to approximately 350°
  6. Add the Jar of Alfredo to the sauce pan with the Garlic and Chives turn to low heat and allow the Alfredo to heat up slowly so it can take on the flavor of the chives and garlic. Add salt and pepper to taste.
    • You can add cheeses at this time if you want to thicken the jar of Alfredo sauce up. It all depends on the brand.
  7. Drain the pasta and add to the sauce pan with the Alfredo in it stir the pasta in. (Leave on Low heat and place a lid over the top to keep it warm while you quickly fry up the shrimp)
  8. Now take the Pre-Made Coconut Shrimp and place flat in the frying pan let fry for approximately 60 seconds on one side and flip it. Keep doing this till the cocunut pieces turn golden brown it shouldnt take more than 4 flips for this. (Careful not to overcook remember its already cooked)
  9. Transfer the finished fried shrimp to a rack to let cool and finish cooking all the shrimp.
  10. Once shrimp is completed plate your Alfredo (Or use a bowl like I did) and add the shrimp to the plate, garnish with chives if youd like.

My love for food and where I think it started? 🤷🏼‍♀️ With Steak 🥩

Where to start with this I think we can blame my grandparents for my very refined palate. They introduced me to fine dining at a very young age and continued to spoil me throughout my entire life with amazing food amongst other things of course. My grandmother still spoils me to this day, but we miss my Grandfather every day, he passed away 2 years ago.

One memorable thing about my Grandfather that I can share with you was that we always knew if he was not a fan of his food. Did not matter if we were at a McDonalds on our way to camp or at one of our old favorites (no longer around) Donatello’s. He was not shy about his opinion of food but that is because he could of probably gone home and done a better job himself. I think this rubbed off on me a little… I don’t make my opinion known vocally, but I do not eat something I do not like. I will move it around the plate or just not eat it at all.

With that being said, I think my first really big taste for food was when I was brought to my first upscale high end steak house. Abe and Louies in Boston, used to be my go to for birthdays and holiday requests. It has since gone down hill – so I do not recommend running to Boston tomorrow, but if your in the area it’s still pretty good just doesn’t have all the things that made me fall in love with them. My go to in Boston is Ruth Chris now. Anyways I digress…

With that being said…… Let’s start with steak 🥩 nothing makes me more dissatisfied then paying decent money for a steak and not having it come out right. I’m a medium rare person and would rather eat it rarer than cooked more… if that makes any sense? It got to the point in life where I was tired of dropping $50-80 on a Texas Road House Meal or Longhorn dinner and having to send something back while I watch whoever I am with eat. 🙄The one thing I cannot eat is steak or meat over cooked just not my thing. So being picky and knowing that I cannot just drive to Boston or go to Dallas on the regular with work anymore I thought how hard can it be to cook a steak?

Tomahawk Steak purchased from Whole Foods

So first I tried filets from Trader Joe’s and they were fabulous and relatively easy to cook. When I cook them again I will blog about it. However for this blog post I wanted to show you the Go Big Or Go Home steak. The one that is the most expensive when you go out the Tomahawk Steak. I found one at Wholefoods I paid $35 for the steak itself. It was a little bit over 2.5 pounds, only other thing I needed I had a at home. Butter, salt, and pepper. You can do other things to it but I am all about that butter and simple taste.. I like the flavor of the steak 🤤 Also I recommend a digital meat thermometer so you can cook to temperature.

So once you have all of your ingredients what’s next? I read an array of posts on Pinterest and the best method seems to be reverse sear which means you salt and pepper the steak and you put it in the oven on a low low temperature. 225° you cook the steak depending on the thickness so you go by the internal temperature. To get that you need to use the digital thermometer and stick it in the middle of the steak… not so far through that you hit the pan the literal middle 😉 your gonna have to check the temp periodically so you do not overcook it’s. You want to remove the steak once the internal temperature reaches around 125°. It took about 50 minutes for my steak to get there. Towards the end of the cooking cycle get out your cast iron pan melt some butter and get it hot but don’t burn the butter. You can add herbs if you want to the pan but I like plain old salted butter, salt, and pepper.

Once you get to that internal temperature (this is attempting for Medium Rare by the way Cook longer if you don’t like that juicy yummy goodness) take your steak out of the oven and throw it in the pan to sear. Turn the pan up at this point and I would flip the steak every minute until desired char but watch that internal temp because you don’t want to overcook it. Right before you take it off throw some butter on top let it melt and rub the steak in it then transfer from a pan to a place to cut, server, and eat. (The picture below the internal temp was 136° which is technically considered Medium but right on that line of Medium Rare)

Tomahawk reverse seared
Internal temp 136°

Was this hard? NOPE

Will I do it again? Possibly – but I’m a filet girl 💁🏼‍♀️

Can you do it? YES!

This is simple to do and you can serve it with potatoes and a vegetable all for under $50! It fed 2 humans and the dogs got some too! Highly recommended for a date night between two or if you just want to eat some steak.

Reverse searing is a great method I’ve learned to use when cooking steak. It gives it that fine dining quality! You can use this method for all steaks just need to watch that internal temp is all.

Ingredients

  • Steak
  • Butter
  • Salt
  • Pepper
  • **‘herbs are optional

Instructions

1.) Pre-heat oven to 225°

2.) Salt and pepper all sides of the steak

3.) Once the oven is up to temp put the steak in the oven. Cook for approximately 45 minutes (possibly more/possibly less) or until the internal temp reaches 125°

4.) Pull the steak out of the oven and transfer to pan with melted butter and sear. Flipping the steak every minute for approximately 5 minutes.

5.) Check the internal temperature and make sure it is 130+ for MR

6.) Remove from pan cut and Serve once steak reaches the desired internal temperature

New To This…

I’ve never had a blog before…. but over the course of the last 10 years I’ve been getting pretty into cooking and blowing up Social media with cooking pictures, recipes, and food concoctions I have made up. I know there are people who are not interested in those kinds of posts. So knowing this and knowing it gets old to some people on Facebook I figured I would create something where it wouldn’t get old! Also, if we’re being honest I need to learn how to take a break from social media and try to do something proactive because we all know how easy it is to get caught up in that social media world.

After receiving my iPad Pro I decided that I should maybe take a swing at something I have been talking about for the last few years. Let’s start a food blog! Something that involves using technology but also can be proactive to share with others out there who actually want to read my posts or look at my insane non-stop food pictures or reviews!

Before I go you may notice on all my pages I have a To Cook list. This list is a running list I have that has recipes I really want to try. However, those recipes might call for a lot of effort or time I need to try them out. So instead of trying to remember these recipes I will add to the list as I find them and then remove as I cook and post about them. (I like to call those my snowy day projects) 🙂

With that said this is my first official post to this blog I’m deciding to try. I do not know if it will go far or if I will stick at it but I plan to attempt to post about all my food excursions and experiments as they come along with a little story behind some of them.